Elektron Digitakt II: A Beginner’s Guide to Getting Started
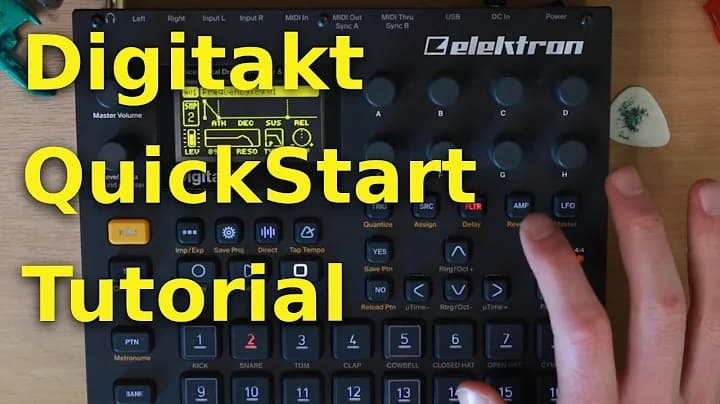
The Elektron Digitakt II is a powerful sampling drum machine and sequencer that offers plenty of creative possibilities, whether you want to build beats from scratch, manipulate recorded audio or control external instruments. For new users, however, its many buttons, menus and functions can initially feel a little overwhelming.
In the accompanying video, we take a practical, hands-on look at the Digitakt II, covering everything from creating your first project and programming beats to recording samples, experimenting with effects and sequencing external hardware.
This guide follows the same journey, introducing the essential features you need to get started and helping you understand how they fit together.
Creating Your First Project
When you switch on the Digitakt II, the device displays its installed firmware version before completing its initialisation.
To begin making music, you'll want to create a new project. Press the cog button to open the settings menu, select Project, and enter the project menu. From there, choose Load Project and scroll to the bottom of the existing projects list, where you'll find the option to create a new project.
Selecting this option initialises a fresh project with a set of default samples ready to use.
As demonstrated in the video, this gives you a clean starting point for exploring the machine without needing to load your own sounds straight away.
Understanding Tracks and Trig Keys
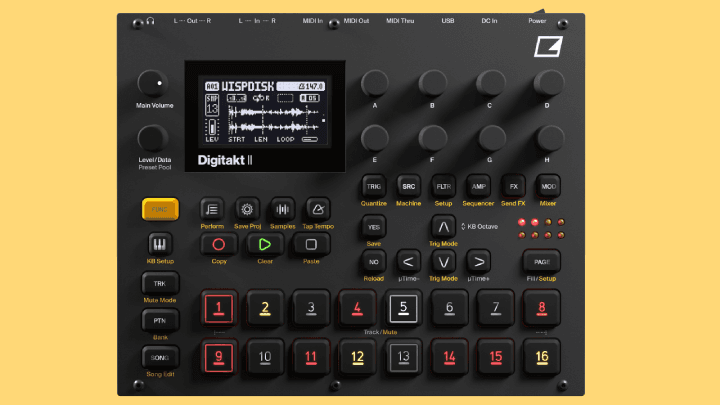
The Digitakt II features 16 trig keys, each corresponding to one of its 16 tracks. These tracks can be configured to perform different functions, depending on the machine assigned to them.
To choose a machine, hold Function and press the Source button. This opens the machine selection options.
The yellow labels printed on the Digitakt II indicate secondary functions, which are accessed by holding the Function button while pressing the relevant control.
You can select a track directly by pressing its trig key. Alternatively, hold the dedicated Track button and press the desired trig key. This second method is particularly useful when you're already inside a menu and want to switch tracks without interrupting what you're doing.
Understanding this distinction makes navigating the Digitakt II much easier as you begin working with different sounds and sequencing patterns.
Loading and Previewing Samples
Although the new project comes with default samples, one of the main attractions of the Digitakt II is the ability to choose your own sounds.
Start by selecting a track, then open the Source section. The sample selection area displays the samples currently available, organised into banks labelled A through H. The default samples loaded with a new project are found in Bank A.
To load another sample, scroll down to an empty slot and press Yes to open the sample browser. From here, you can navigate through the factory sample library, which includes categories such as drum hits, textures and oscillators.
Use the arrow keys to navigate between folders. To move back one folder, hold Function and press Back. To enter a folder, press Yes or use the Function and Forward shortcut.
When you find a sound you like, you can preview it by holding Function and pressing Yes. Holding Yes allows you to hear the full sample, while a shorter press gives you a shorter preview.
Once you've found the right sound, press Yes to assign it to the selected sample slot. You can then return to the main editing screen by pressing No to move back through the menus.
The video demonstrates this process by loading a closed hi-hat into an empty slot and triggering it from the corresponding track.
Programming Beats with the Step Sequencer
One of the easiest ways to start building a beat is with the step sequencer.
Press Record to enter step-recording mode, then use the trig keys to place notes at the desired steps. Each step represents a position in the sequence where a sound can be triggered.
For example, you could programme a kick drum on one step and a snare on another, then press Play to hear the pattern. You can switch between tracks while remaining in step-recording mode, allowing you to build up a rhythm across multiple sounds.
The Digitakt II also allows you to extend your patterns. Its sequencer is organised into pages, and you can use the page setup menu to increase the pattern length. The first page can be copied to the next page, effectively doubling the sequence and providing more room for variation.
The sequencer supports patterns of up to 128 steps. Longer patterns can be useful when you want a more developed rhythm rather than a short, repeating loop.
As shown in the video, adding a variation on a later page can introduce subtle changes to an otherwise repetitive beat.
Recording Beats in Real Time
If you prefer playing rhythms rather than programming individual steps, the Digitakt II also supports live recording.
Before recording, you may want to enable the metronome. Open the metronome settings and use the corresponding data encoder to switch it on. This gives you a timing reference while you perform.
To start live recording, press Record followed by Play. The Record button begins flashing when recording is active, indicating that the machine is ready to capture your performance.
You can then trigger sounds across multiple tracks in real time. This is particularly useful for capturing a more natural performance or experimenting with rhythms that are less straightforward to programme manually.
Once you've recorded a pattern, you can turn off the metronome and listen back to the result.
A useful tip: The Clear function is accessed by holding Function and pressing Play. This removes the contents of the pattern, so use it carefully to avoid accidentally deleting work you want to keep.
Playing Melodies with Keyboard Mode
The Digitakt II isn't limited to percussion. Its keyboard mode allows you to play pitched samples, making it possible to build basslines and melodic parts alongside your drums.
Select a track containing a suitable sample and press the dedicated Keyboard button. The trig keys can now be used to play different pitches.
You can also adjust the available notes by changing the scale in the keyboard setup menu. Options include musical modes such as Ionian, Dorian and Phrygian, as well as scales such as blues.
Restricting the available notes to a particular scale can make it easier to create melodies that work together harmonically.
The octave can also be changed to access higher or lower pitches, depending on the role you want the sound to play in your arrangement.
The video demonstrates how these features can be used to turn a sample into a simple bassline.
Working with Different Pattern Lengths
Not every part of a track needs to repeat over the same number of steps. For example, you might want a drum pattern to loop every two pages while a bassline develops over four.
The Digitakt II provides per-track length settings through the page setup menu. Hold Function and access the page settings, then use the per-track option to adjust the length of an individual track.
There is an important detail to remember, however: the overall project or pattern length needs to accommodate the longest part you want to play. As the video demonstrates, extending an individual track isn't sufficient if the overall sequence is still set to a shorter length.
Setting the global length appropriately first helps ensure that longer melodic or rhythmic parts play as intended.
Shaping Sounds with Effects and Trig Conditions
Once you've established a basic rhythm, the Digitakt II offers plenty of options for shaping individual sounds.
Its track-editing sections provide access to effects, envelopes, filters and low-frequency oscillators (LFOs). These parameters can dramatically change the character of a sample, from adding space and movement to creating more aggressive textures.
The effects section includes chorus, reverb and delay. Chorus can help widen a sound, while reverb and delay add ambience and rhythmic echoes.
You can also introduce variation through the trig settings.
Probability determines how often a particular trig plays. Reducing the default 100% value means a sound won't necessarily trigger on every repetition of the pattern.
Trig conditions provide another way to create variation, allowing individual steps to play according to specific conditions, such as on the first loop or on alternating loops.
Together, probability and trig conditions can make patterns feel less repetitive and help you develop more dynamic arrangements without manually programming every change.
Starting Quickly with Preset Kits
If you want to make music without configuring every sound yourself, the Digitakt II includes preset kits that provide a useful starting point.
Open the Kits section, navigate to the load option and choose a kit from the available list. Loading a kit configures sounds and settings across tracks, using samples already available on the device.
These presets can be a good way to explore the machine's sound-design possibilities while learning how different parameters interact.
They can also serve as a foundation for your own work. Once you've loaded a kit, you can replace individual samples, change effects and adjust the settings to suit your style.
One thing worth remembering is that a track's existing effects and other settings can remain in place when you replace its sample. If a new sound suddenly has unexpected reverb or other processing, the track may still be using settings inherited from the preset.
Sampling External Audio
Sampling is central to the Digitakt II, and recording audio directly into the machine opens up another set of creative possibilities.
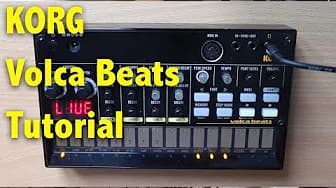
In the video, an external Korg Volca Beats is connected to the Digitakt II's audio input. Once connected, open the Recorder section and check that an incoming audio signal is visible.
To hear the incoming audio through the Digitakt II, adjust the monitoring setting. The demonstration switches the monitor option from Postmix to Premix to hear the external source.
The recording threshold determines the signal level required to trigger recording. Adjust it according to the level of the incoming audio.
For a more convenient workflow, enable the recording arm option and start recording. The Digitakt II can then begin capturing audio as soon as it detects a signal above the threshold. This helps avoid recording unnecessary silence at the beginning of a sample.
When you've captured the audio, press Yes to stop recording. You can preview the result using Function and Yes, then trim the beginning or end of the recording to remove unwanted material.
Once you're happy with the sample, press Yes to save it. You can give it a name and then choose whether to assign it directly to one of the tracks.
The video also demonstrates an important troubleshooting tip: if the sample sounds heavily processed after being assigned to a track, clearing the track can remove the unwanted settings. However, clearing the track also removes its sample assignment, so you'll need to assign the recording again afterwards.
Using Machines to Stretch and Slice Audio
The Digitakt II offers several machine types that change how a track plays its sample. These options are particularly useful when working with recorded loops or samples that don't match the tempo of your project.
The main options demonstrated in the video include:
One-shot: Plays the sample from beginning to end without automatically matching it to the project's tempo.
Warp: Allows samples and loops to be adapted to the tempo of the project or pattern.
Stretch: Uses granular processing to stretch audio, potentially changing its texture and sound.
Repitch: Matches the sample to the target tempo by changing its playback pitch.
Grid: Allows audio to be sliced into segments that can be triggered individually.
MIDI: Turns a track into a MIDI track for sequencing external equipment.
The differences between the stretching modes are worth experimenting with. Stretching can produce interesting textures, while repitching may sound more natural for some material but changes the pitch as the playback speed changes.
In the video, a recorded drum loop is assigned to a track and tested with different machine types. The loop is brought into time with the existing pattern, demonstrating how a complete rhythmic part can be built around a single sampled loop.
Using loops in this way can help you create fuller arrangements while keeping the number of tracks dedicated to individual drum hits relatively low.
Sequencing External Instruments with MIDI
The Digitakt II can also function as a MIDI sequencer, allowing it to control external instruments rather than simply playing its own samples.
To try this, connect a MIDI cable from the Digitakt II's MIDI output to the MIDI input of an external device, such as the Volca Beats used in the video.
Choose a track, open the machine selection menu using Function and Source, and change the machine type to MIDI.
The Source section will then display MIDI-related settings. One important parameter is the MIDI channel, which needs to match the receiving channel configured on your external instrument.
Once the connection and channel settings are correct, you can programme or live-record MIDI notes in much the same way as you would sequence the Digitakt II's internal sounds.
The video demonstrates sending MIDI to the external instrument and recording a short sequence of drum sounds. It also captures an unexpected crash during the initial experimentation, illustrating that setting up external hardware may involve a little troubleshooting.
Nevertheless, using MIDI in this way significantly expands the Digitakt II's role in a hardware setup, allowing it to act as the central sequencer for other instruments.
Saving Your Project
After spending time building a pattern, editing sounds and recording samples, saving your project is essential.
Open the project menu using the cog button and select Save Project. Choose an empty project slot, press Yes and enter a name using the arrow keys.
Once you've confirmed the name, the Digitakt II saves the project so you can return to your work later.
It's a simple step, but one that's easy to overlook when you're caught up in experimenting with a new piece of equipment.
Experimenting Safely with Temporary Pattern States
Another useful feature demonstrated in the video is the ability to save and reload a temporary pattern state.
This gives you a way to experiment with sound design without permanently losing the version you started with.
Use Function and Yes to save the current pattern state to the temporary area. You can then change effects, adjust sounds and try different processing combinations.
When you're ready to return to the original state, use the Reload function to restore the saved temporary version.
This is particularly useful for live performance and experimentation. You can make substantial changes to a pattern, explore more extreme effects and then return to your earlier version without having to reconstruct it manually.
Conclusion: Building Confidence with the Digitakt II
The Elektron Digitakt II offers a wide range of tools for sampling, sequencing, sound design and hardware integration. Although its interface may take some getting used to, the basic workflow is straightforward once you understand how tracks, machines, samples and sequencer pages fit together.
Start by creating a project, loading a few samples and programming a simple beat. From there, experiment with live recording, keyboard mode, effects and different pattern lengths. Once you're comfortable with the fundamentals, try recording external audio, stretching loops and using MIDI to control other instruments.
The accompanying video walks through each of these processes with practical demonstrations, making it a useful companion as you explore the machine yourself.
Most importantly, don't feel that you need to master every feature at once. The Digitakt II rewards experimentation, and some of its most interesting results will come from trying different machines, processing combinations and sequencing techniques.
With a few basic skills in place, you'll have everything you need to start building beats, developing ideas and discovering your own workflow on the Digitakt II.